Troubleshoot network problems
This section of the documentation is dedicated to troubleshooting basic network problems. infrastructure of the “SIM-Cloud” service project.
Reloading the project router
This article describes the step-by-step steps for performing a soft restart. internal built-in router of the user project of the “SIM-Cloud” service. Also, this article has a brief description of the purpose of the project router, its functions. With the help of step-by-step instructions, the user will be able to independently perform restarting the router in case of diagnostics or repair work network infrastructure of the project.
- Description
- When is it worth restarting the built-in router
- Process of restarting the router in Dashboard
Description
Each project of the “SIM-Cloud” service in its network infrastructure contains central built-in router that routes the project’s networks.
It is this central network node (provider router) that acts as a gateway for external network (WAN) of the project and in fact is an interface for outgoing and incoming traffic from / to the public network by performing the procedure SNAT “network address translation” between public and private networks.
When is it worth restarting the built-in router
In certain cases, it may be necessary to perform a restart built-in router. Restarting the router is allowed within troubleshooting the project network.
In the event that the project administrator records difficulties in the form:
- short-term lack of access to instances;
- loss of network packets;
- periodic disconnections of VPN connections;
and the settings are checked security groups, instas configuration settings, as well as the influence or external factors are excluded, for example, a malfunction of the Internet provider or incorrect operation equipment with which the cloud infrastructure communicates, then you can consider the option to reboot the project router.
Process of restarting the router in Dashboard
Next, we’ll walk you through the step-by-step process of restarting the embedded central project router from the graphical control panel - Dashboard.
On the login page https://docs.sim-cloud.net nter your username, password and click “Connect”, the authorization process is described in more detail in our article Quick start (the first section of the article “Entering the toolbar” SIM Cloud “- dashboard”).
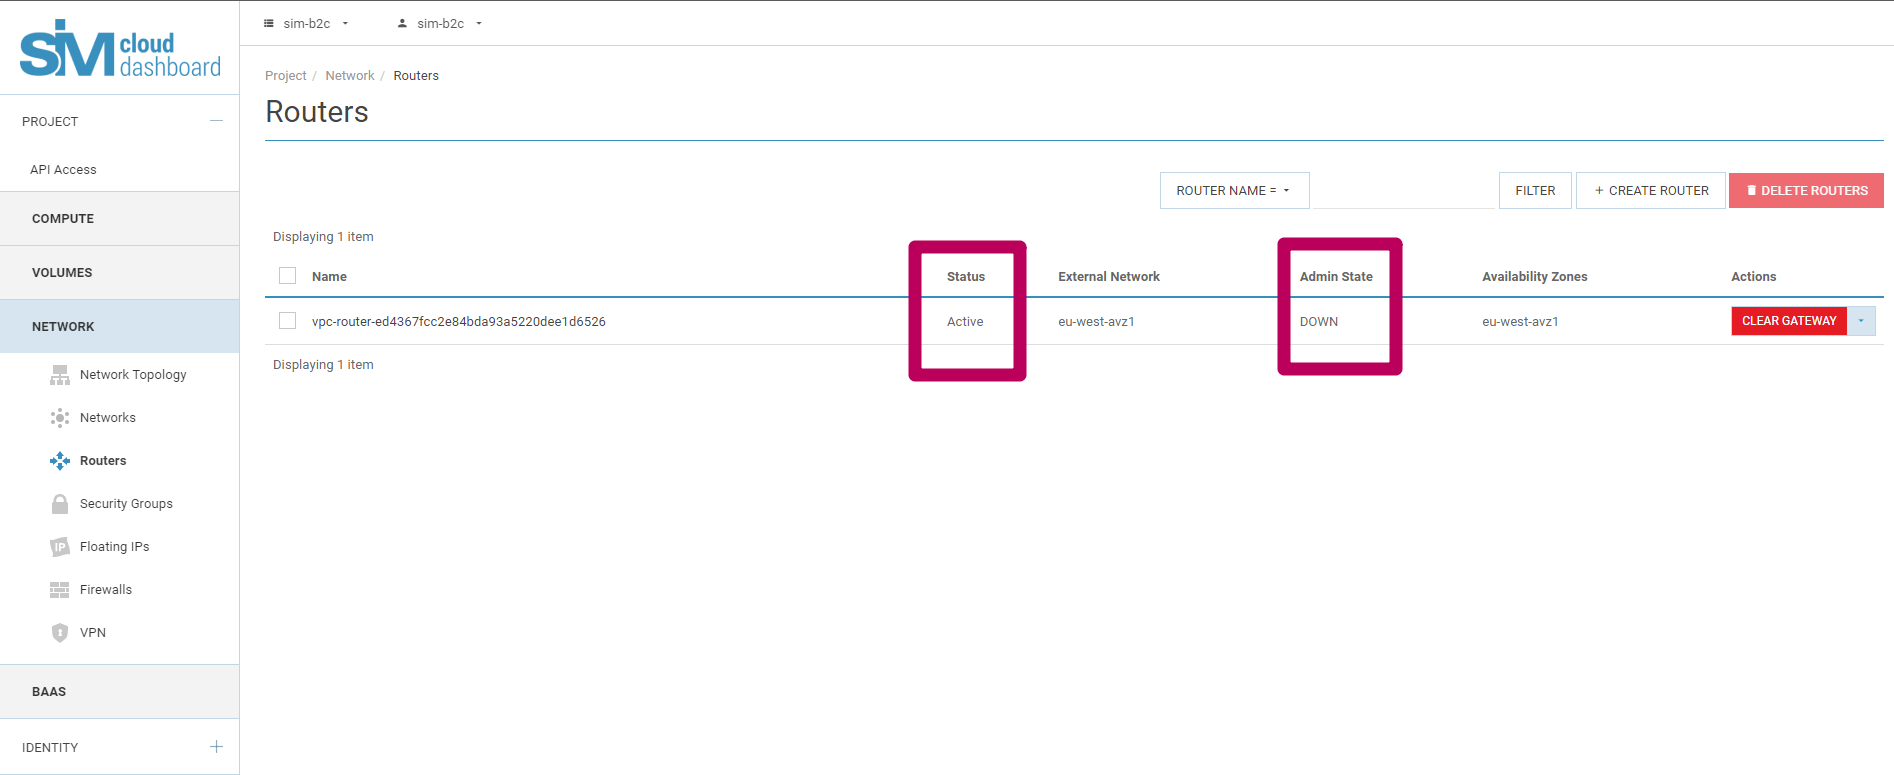
Then you need to go to the “Network” section of the project, select the “Routers” item. On the “Routers” control panel page, you will see a list of created in the router project. Typically, the standard project configuration includes only one router named vpc-router-Project_ID (example: vpc-router-a84030ae422a4173b4d0e7495cda2581, where a84030ae422a4173b4d0e7495cda2581 - is the universal identifier for your project). Also on this page you can view the current status and Administrative status of the router. In the normal, working state, the router has the status “Active”, the administrative state is “UP”.
For faster navigation, the URL can be used: https://cloud.sim-cloud.net/project/routers/, which will immediately open the necessary page with the project’s routers.
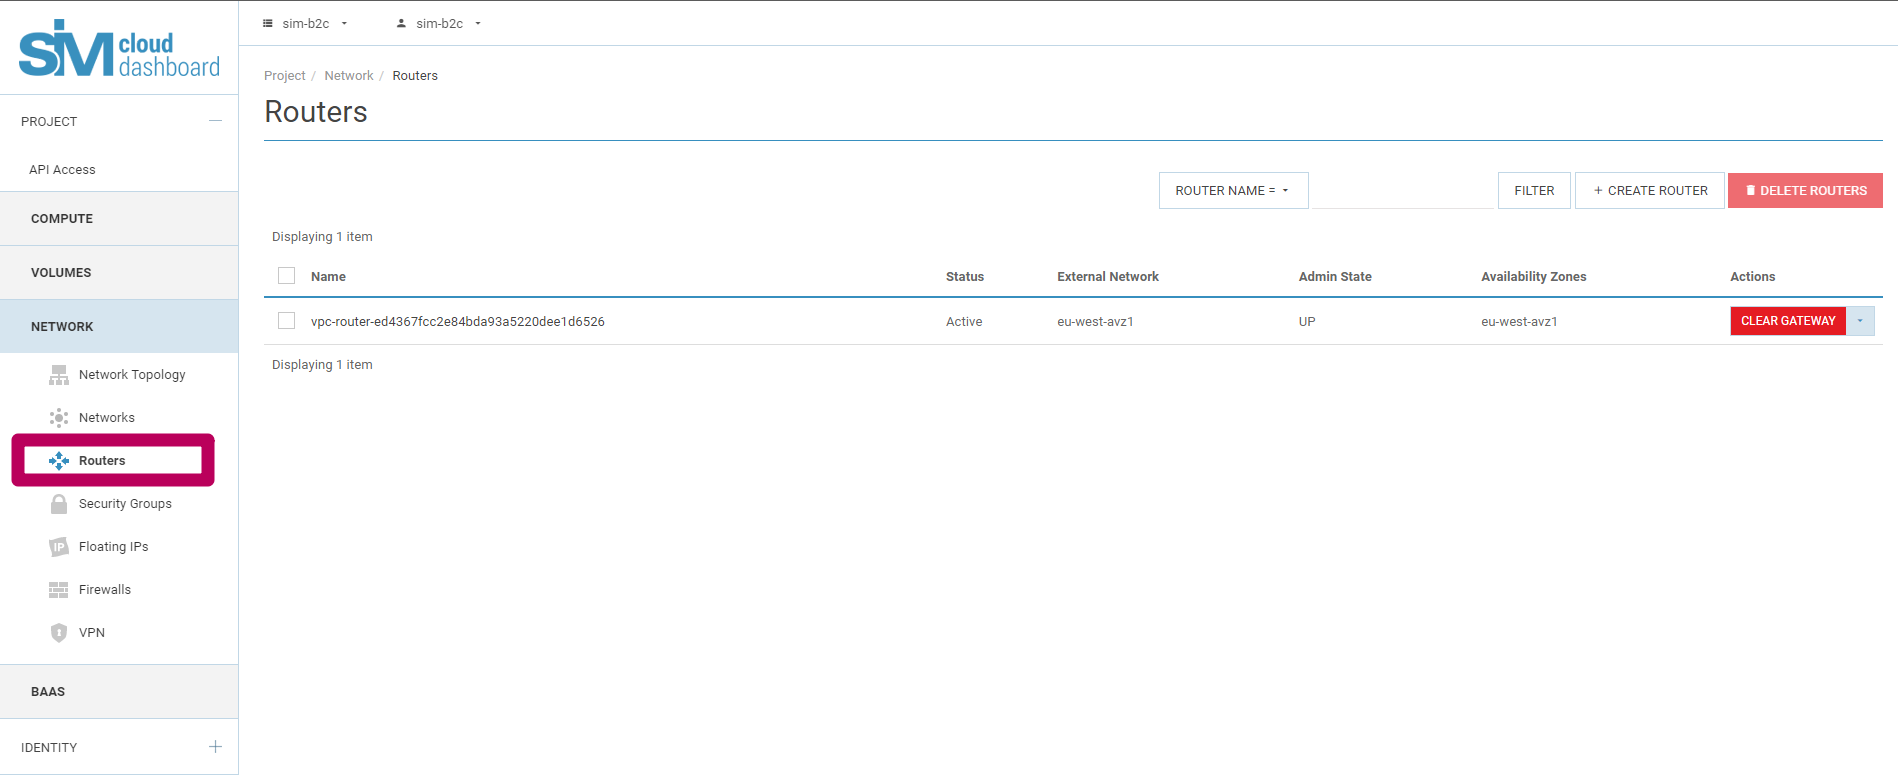
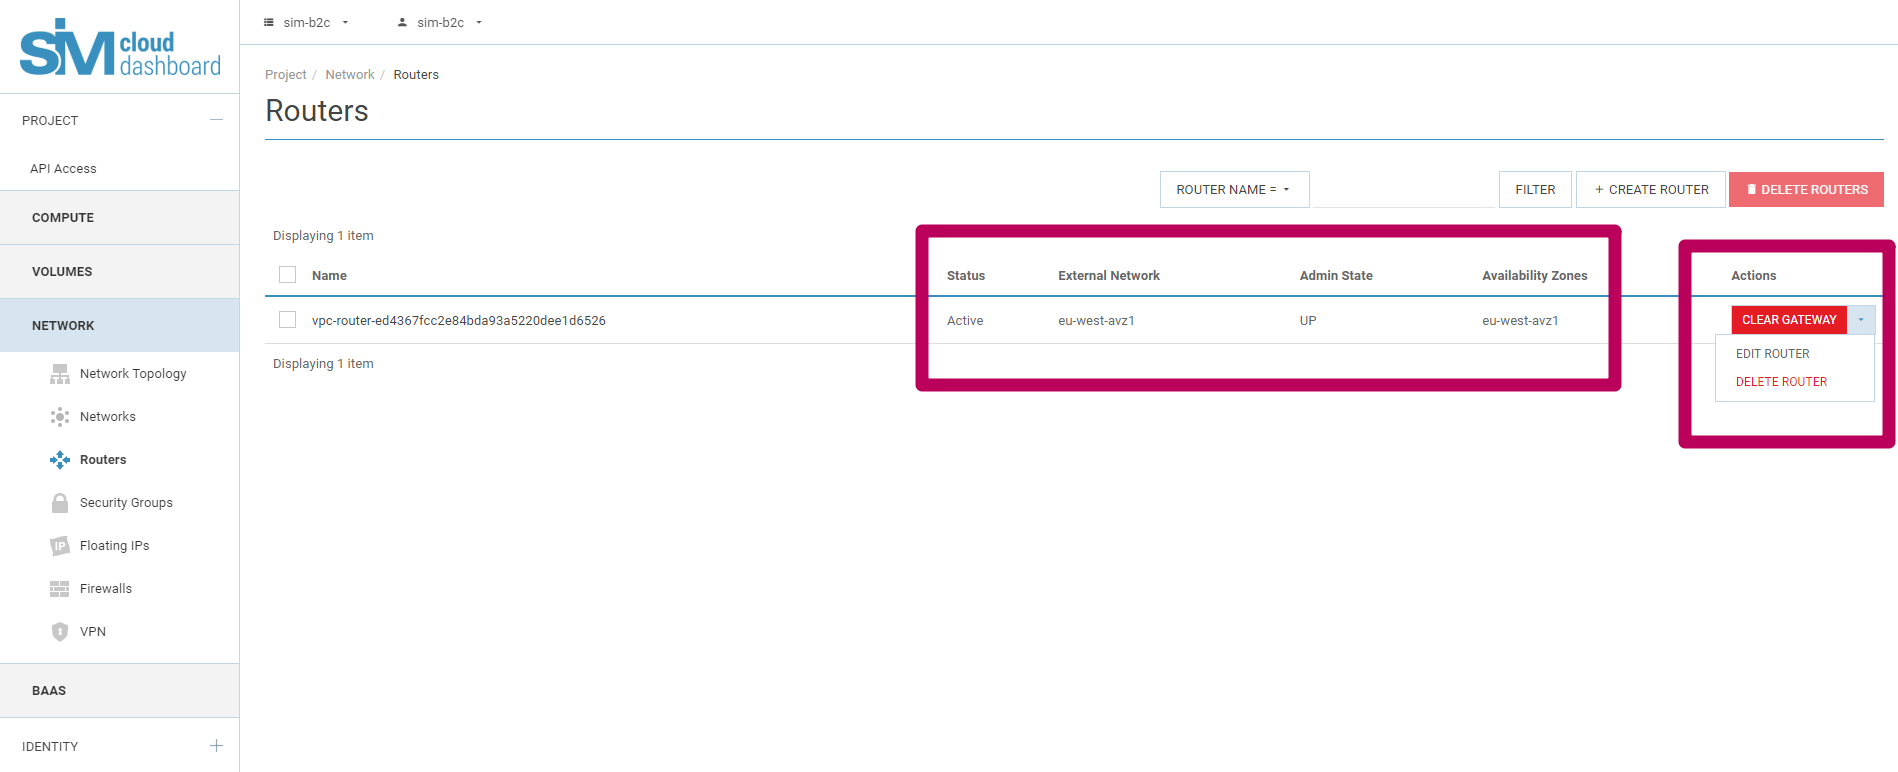
- Further to the right of the required router, in the “Actions” column from the drop-down menu
- it is necessary to select the action “Change router”. This action will cause a dialog box in which the process of restarting the router is performed. The restart process is done by switching the state of the router “Admin State”, switching is performed by assigning or unchecking the “checkbox”.
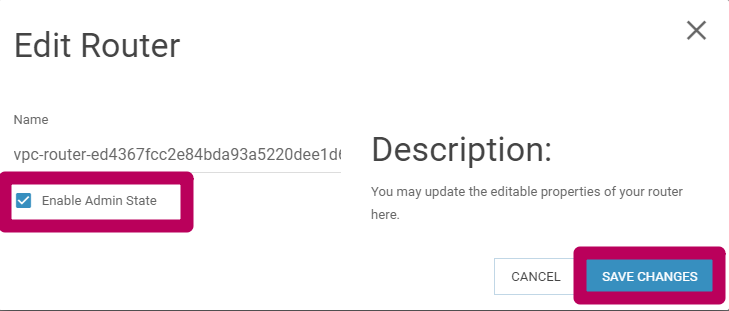
- If the “checkbox” next to the “Enable Admin State” entry is checked, then the router
- has an Administrative status of “UP”. If the “checkbox” is absent, then the router has the Administrative state “DOWN”.
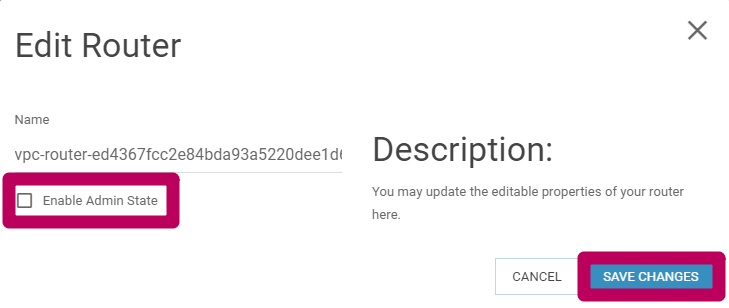
- In order to restart the router, you must uncheck the “checkbox” next to the entry
- “Enable Admin State”, and then click the “Save Changes” button.
- After successfully saving the changes made, the router will go into a state
- “DOWN”, the service will generate a notification “Success: Router vpc-router-a84030ae422a4173b4d0e7495cda2581 was successfully updated. “
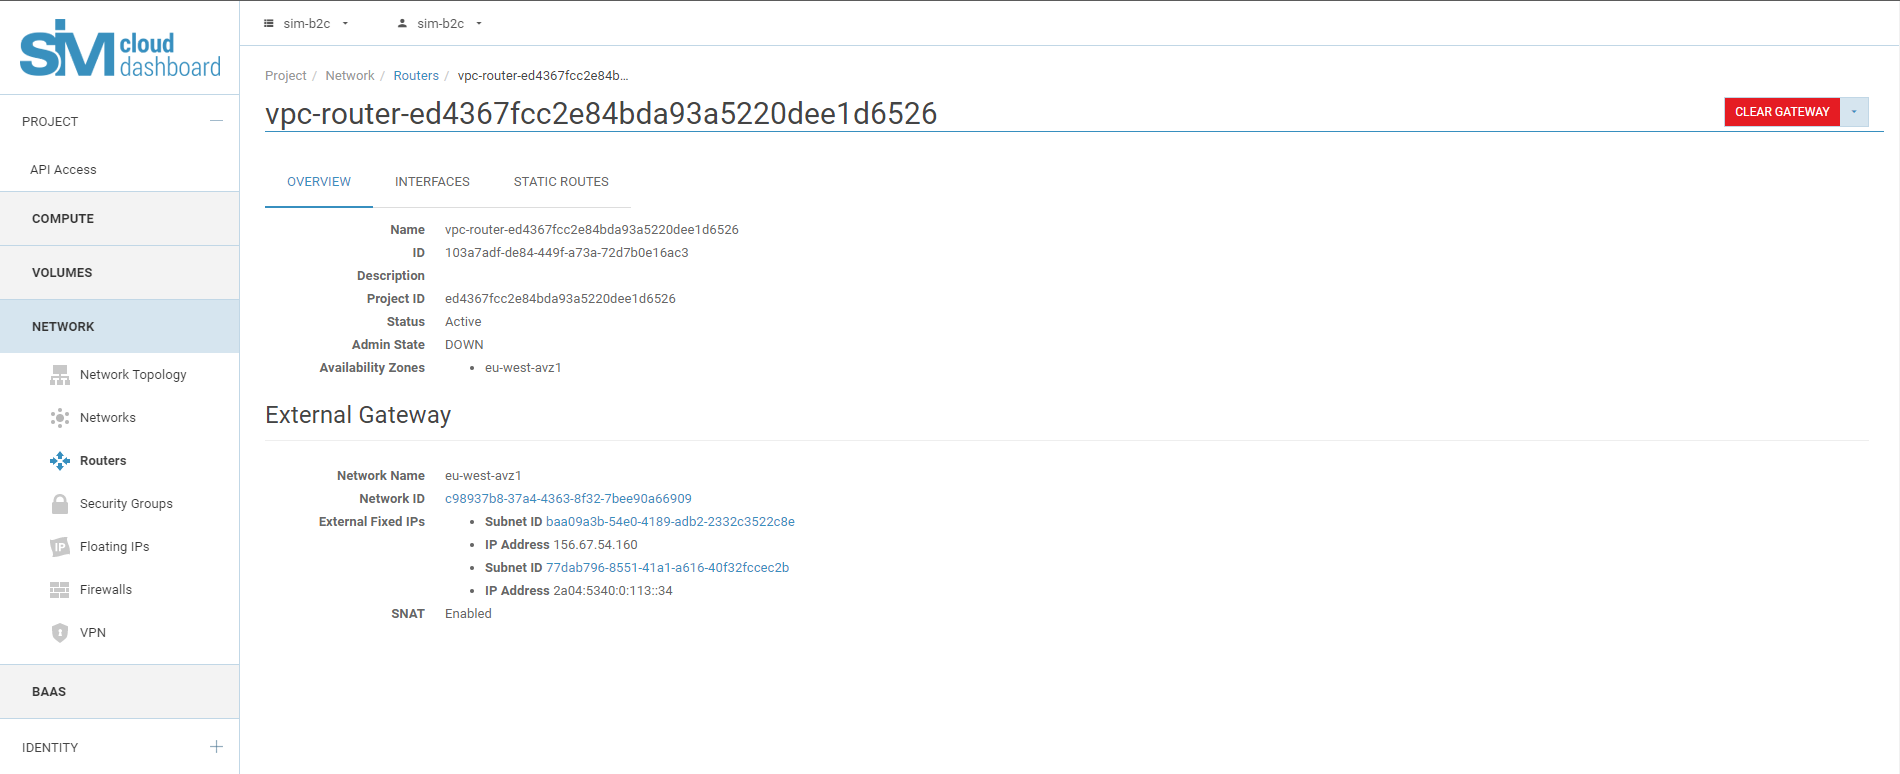
- Next, go to the router management menu, for this you need to click
(“click”) on the name of the router. On the top control line the router must select the “Browse” item. In the window that opens, there will be displays the technical parameters of the router, its attributes, among which you need select an IP address, in this case the IP address is 156.67.54.49.
Normal mode if the router is in an administrative state “UP”, the router address always responds to ICMP requests (responds to the “ping” command). If the router is in the “DOWN” state, then, accordingly, its public the address will not respond to ICMP requests.
We recommend that you execute the “ping” console command to the address of the router. Example: ping 156.67.54.49 In the active state, the user will see the response from the router:
ping 156.67.54.49
PING 156.67.54.49 (156.67.54.19) 56(84) bytes of data.
64 bytes from 156.67.54.49: icmp_seq=1 ttl=49 time=39.7 ms
64 bytes from 156.67.54.49: icmp_seq=2 ttl=49 time=36.1 ms
64 bytes from 156.67.54.49: icmp_seq=3 ttl=49 time=38.8 ms
64 bytes from 156.67.54.49: icmp_seq=4 ttl=49 time=36.9 ms
64 bytes from 156.67.54.49: icmp_seq=5 ttl=49 time=39.3 ms
--- 156.67.54.49 ping statistics ---
5 packets transmitted, 5 received, 0% packet loss, time 4006ms
rtt min/avg/max/mdev = 36.190/38.222/39.701/1.388 ms
After the router is manually put into the “DOWN” state, it will stop responding to the above command:
ping 156.67.54.49
PING 156.67.54.49 (156.67.54.49) 56(84) bytes of data.
From 156.67.52.96 icmp_seq=1 Destination Host Unreachable
From 156.67.52.96 icmp_seq=2 Destination Host Unreachable
From 156.67.52.96 icmp_seq=3 Destination Host Unreachable
From 156.67.52.96 icmp_seq=4 Destination Host Unreachable
From 156.67.52.96 icmp_seq=5 Destination Host Unreachable
--- 156.67.54.49 ping statistics ---
10 packets transmitted, 0 received, +5 errors, 100% packet loss, time 9146ms
pipe 6
Lack of network reachability with a router will indicate it shutdown, while the router resets its settings, public addresses in this case do not change. Then you can go to the point of turning on the router.
- Install the “checkbox” next to the “Enable Admin State” entry, this will translate
the router into the Administrative state “UP”, and the router will update your settings, SNAT rules will be redefined. The result of restoring the operation of the router will be its network reachability, the router will start responding to the “ping” command again.
In the specified way, changing the “checkbox” next to the “Enable Admin State” entry, a software restart of the router is performed.
Note
Turning on (recovering) the router may take from 30 seconds to 1 minute, consider this warning when restarting your router.