Using a key pair (ssh-key) for instances with cloud images
- Creating a key pair in Dashboard when creating an instance
- Connecting to an instance using an existing ssh key
- Connecting to an instance from multiple hosts
- How to connect to an instance if you forgot to specify the ssh key
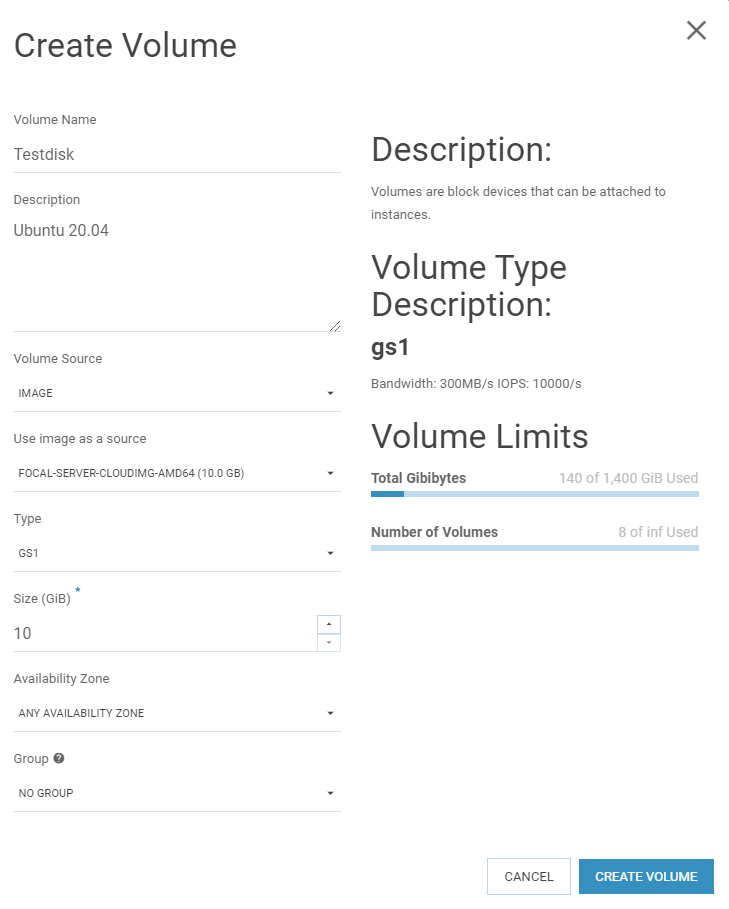
When creating a new disk, at the stage of choosing an image, in the “Use image as source” You can see two types of images:
- With a prefix in the name: “cloudimg”, “openstack”, “GenericCloud” for example: “focal-server-cloudimg-amd64”.
- Without a prefix, eg GNU Linux Debian 9.3 [EN] (see figure below).
The peculiarity of the first type is that after deploying instances based on such images, you can log in to the system only using key pair (SSH key), log into the system created from such an image with using a username and password will not work.
How to create key pairs and perform the first authorization in the new system and will be discussed in this manual.
Key pairing options for instances in the SIM-Cloud».
There are 2 options for creating a key pair:
- A key pair can be created in the “SIM-Cloud” project control panel when creating an instance.
- You can create a key pair yourself in advance on a local computer, and then import the public key into the SIM-Cloud and attach it to the instance at the stage of its creation.
Let’s consider each of the options step by step.
1. Creating a key pair in the “Sim-Cloud” project control panel when creating an instance.
Creating a key pair in Dashboard when creating an instance
1.1. Create a disk and use an image with the prefix cloudimg / openstack / GenericCloud as a source for it.
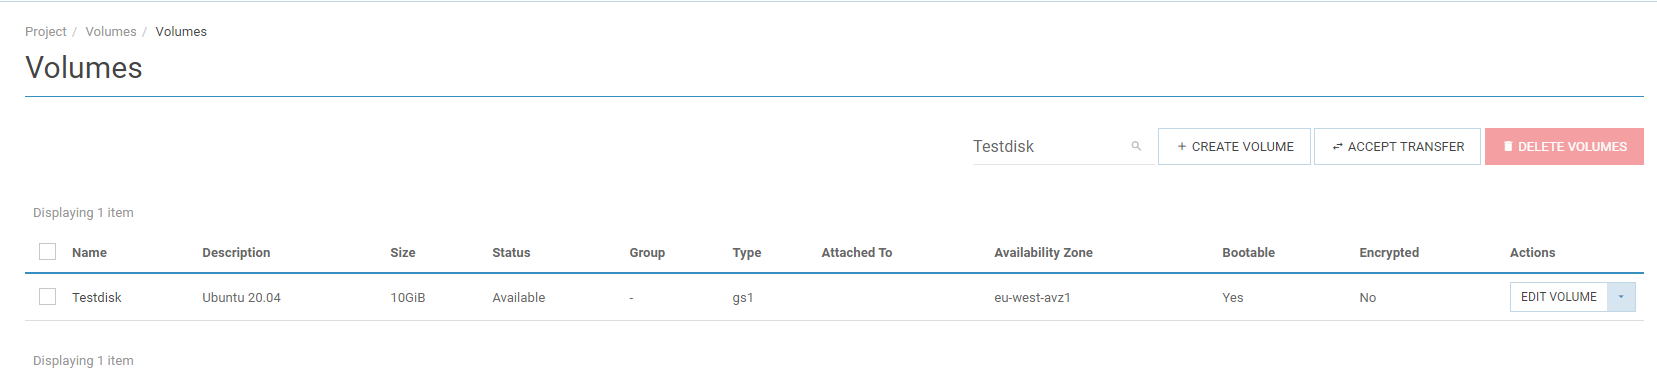
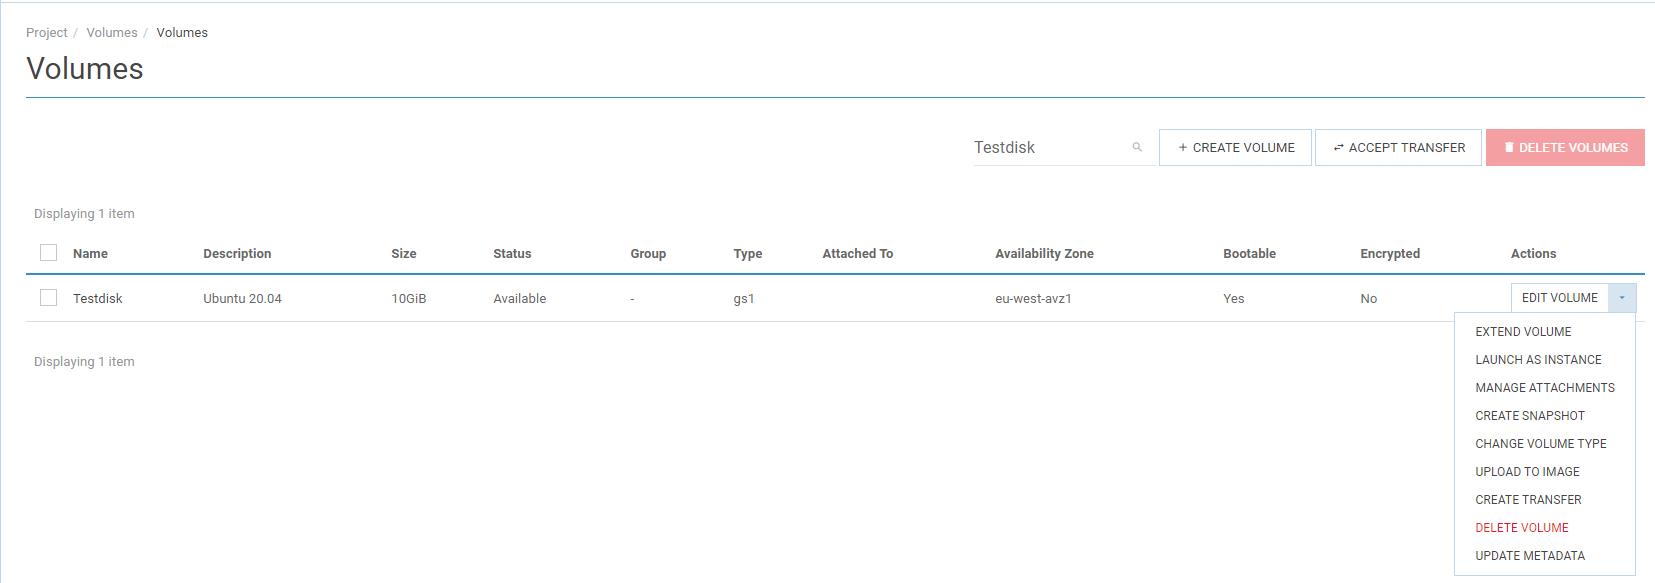
1.2. In the disk control panel, opposite the desired disk, select “START AS INSTANCE”, after which a new window will open where we need to fill in the fields with the necessary parameters.
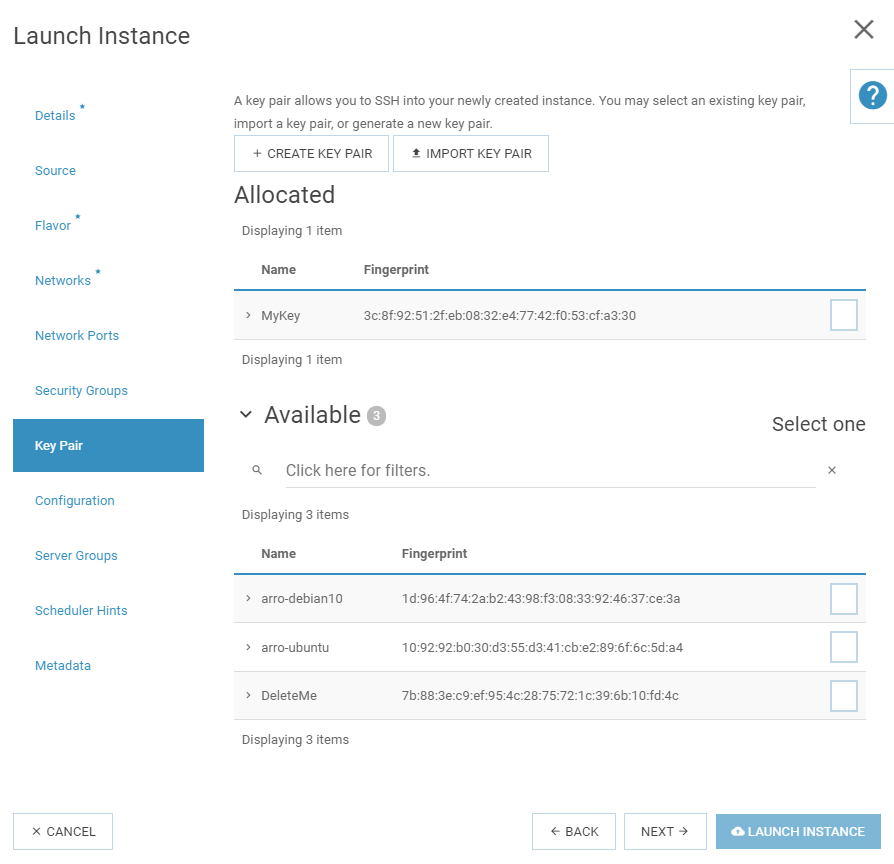
1.3. In this window, in the “Key pair” section, click the “Create a keychain” button.
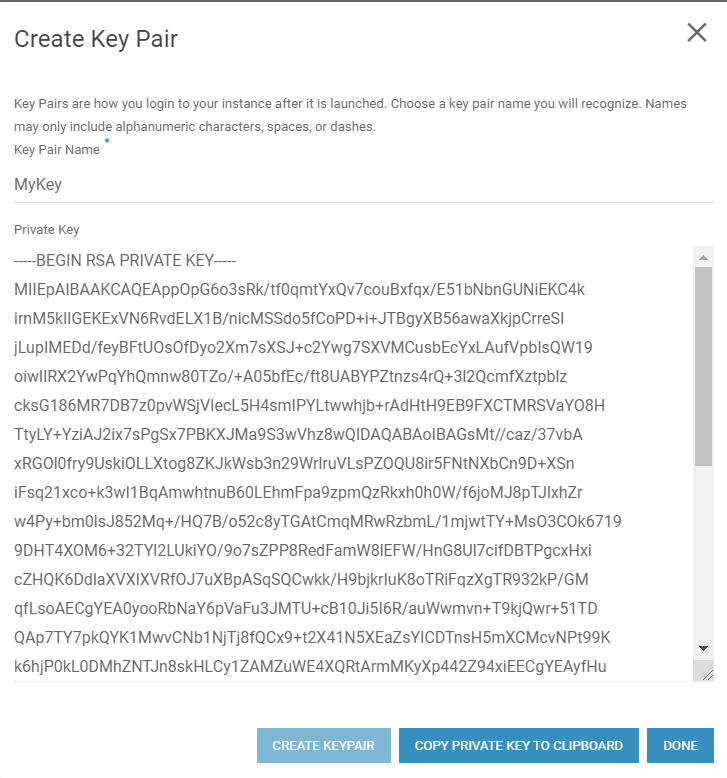
1.4. In the “Key Pair Name” field, enter the desired name of our key pair and press the “CREATE KEY PAIR” button.
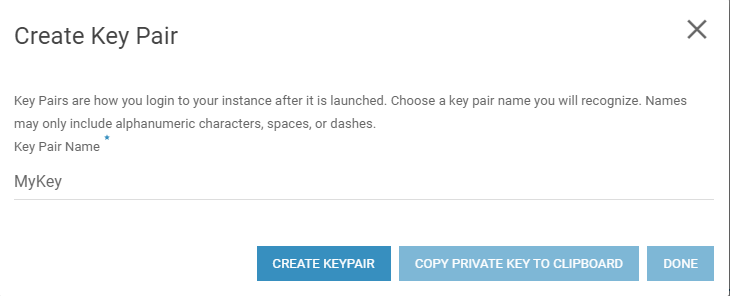
1.5. As a result, we will get a window with a new private key. This key must be saved in text format to your local computer and then press the “DONE” button.
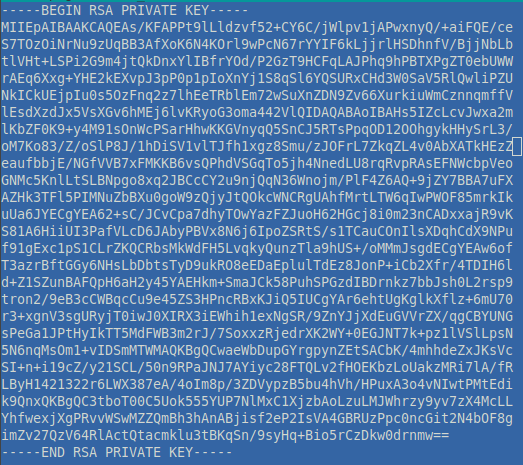
1.6. On the local computer, along the path “/home/user_name/.ssh” (if the folders “.ssh” no - we create it) with any convenient editor we create a file named “id_rsa” and paste into it the key that we copied in the previous step, save changes made.
Important
The key must begin with the line “—– BEGIN RSA PRIVATE KEY —–”, and end with the line “—– END RSA PRIVATE KEY —–” as, for example, on figure below.
1.7. This completes the SSH key connection setup. After successfully creating an instance from the command line on the local computer we just need to enter the command “ssh ubuntu @ server-ip-address” and confirm a request to connect to a new server, authorization on the server will pass automatically, you do not need to enter a password.
After the first login, you can add new users to the server, change passwords for existing ones, activate login-password authorization if You do not want to use key authentication, etc.
~$ ssh ubuntu@156.67.**.8
The authenticity of host '156.67.52.82 (156.67.**.8)' can't be established.
ECDSA key fingerprint is SHA256lejXFyOX4jDtMdASdP8BLE8OHfQ.
Are you sure you want to continue connecting (yes/no)? yes
Note
When you first log into the server instead of the user in the name “ubuntu” example, if you deployed Debian / CentOS / Fedora you need to use username “debian”, “centos”, “fedora”, etc.
2. Creation of a key pair on the local computer, import of the public key into the “SIM-Cloud” project.
Connecting to an instance using an existing ssh key
Consider the second option for creating and using a key pair.
2.1. On the local computer in the terminal, you must run the command “ssh-keygen”, for all requests just press “Enter”. We will get a result similar to which we see in the figure below.
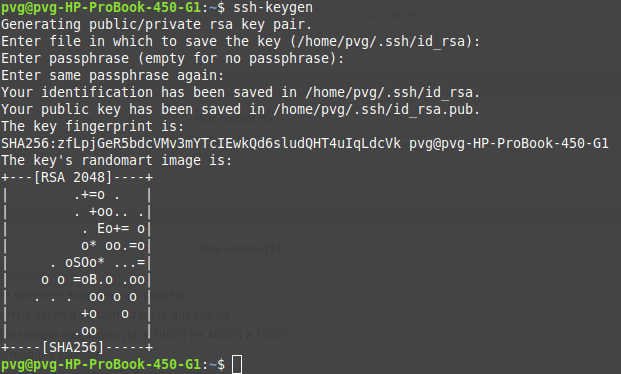
As a result, a folder “.ssh” will be created in the user’s home folder, and in it you will see 2 files with keys: public (id_rsa.pub) and private (id_rsa).

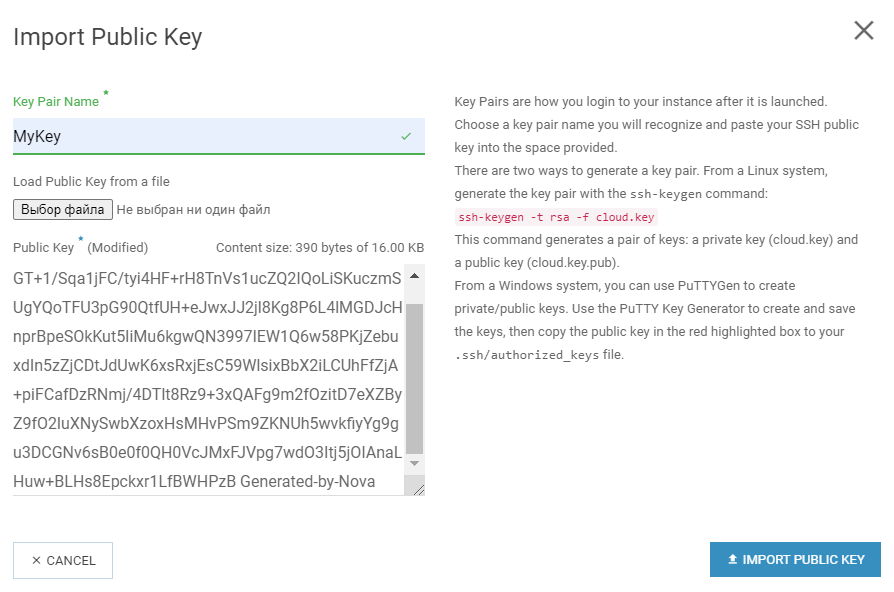
2.2. In the control panel “SIM-Cloud” go to “Computing resources” - “Key pairs” and click “IMPORT PUBLIC KEY”
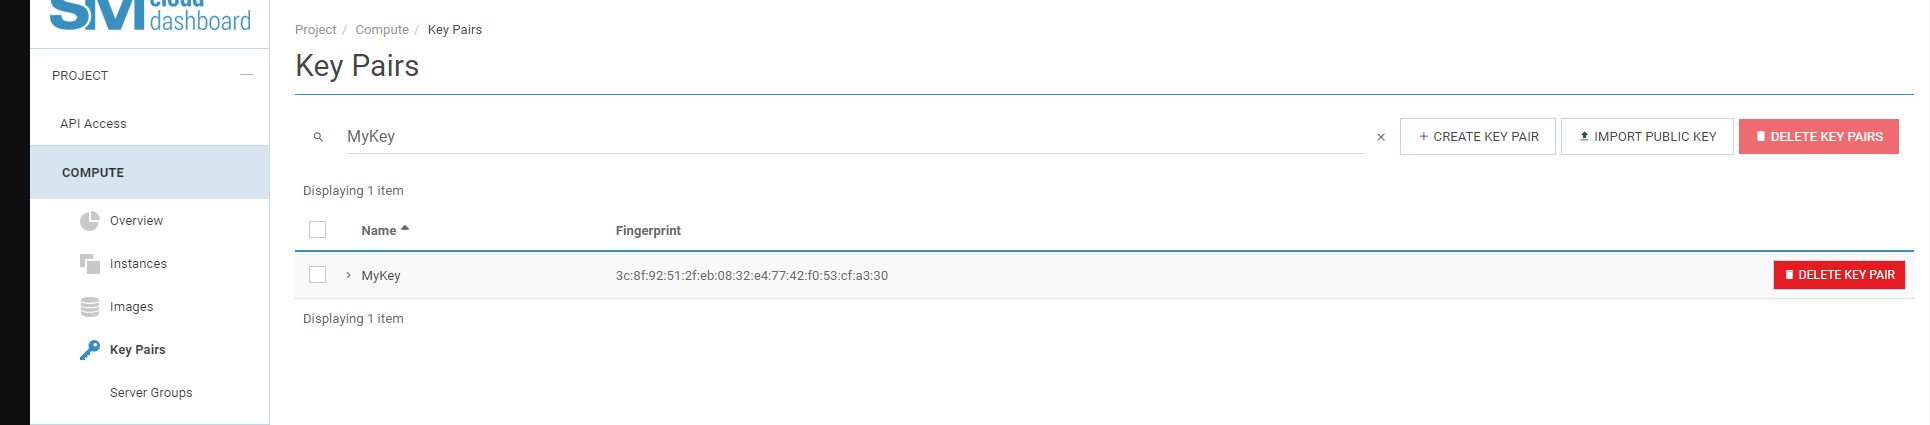
2.3. In the window that opens, in the “Key Pair Name” field, enter the desired name of the key pair, press the button “Browse” and select our file “id_rsa.pub” which we got on first step. Press the button “IMPORT PUBLIC KEY”. Our key will appear in the list of available ones.
2.4. In the control panel “Sim-Cloud” create a disk and as a source for we use the image with the prefix cloudimg / openstack / GenericCloud in the name.
2.5. In the disk control panel, opposite the desired disk, select “START AS INSTANCE “, after which a new window will open where we need to fill in fields with the required parameters
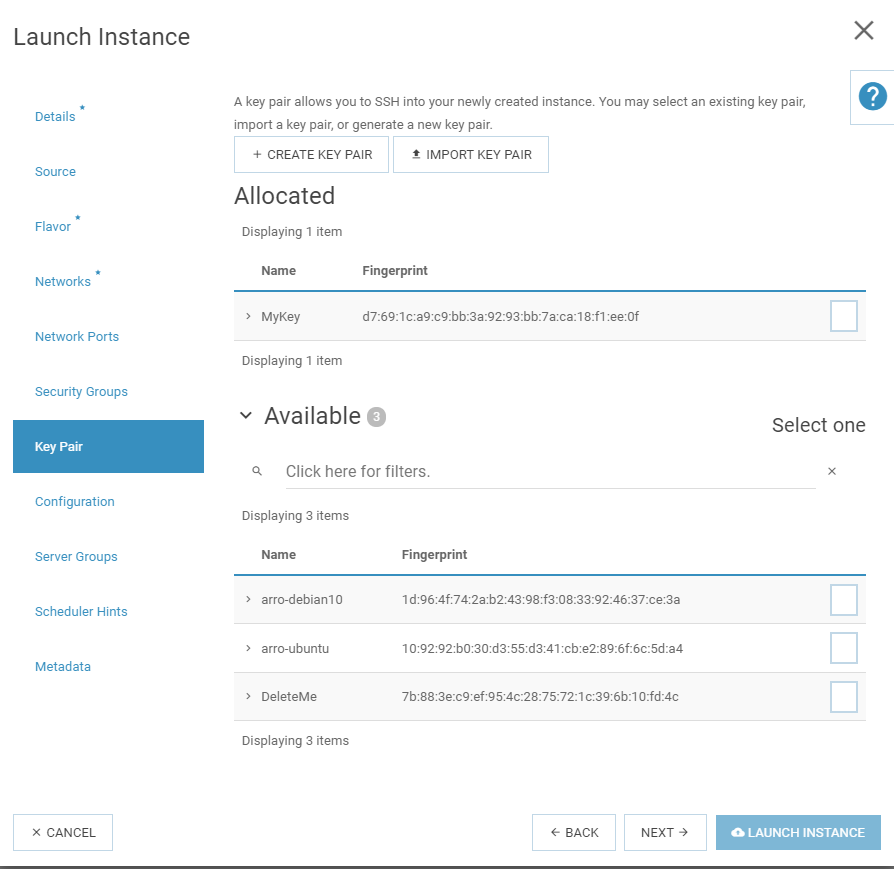
2.6. In this window, in the “Key pair” section, select our imported key and click “Launch instance”. As a result, our public key is automatically will be imported into the ~/.ssh/authorized_keys file on our server.
2.7. НThis completes the SSH key connection setup. After a successful creating an instance in the terminal on the local computer, we just need to enter command “ssh ubuntu @ server-ip-address” and confirm the request to connect to new server, authorization on the server will take place automatically, enter the password not necessary.
After the first login, you can add new users to the server, change passwords for existing ones, activate login-password authorization if you do not want to use key authorization, etc.
~$ ssh ubuntu@156.67.**.8
The authenticity of host '156.67.52.82 (156.67.**.8)' can't be established.
ECDSA key fingerprint is SHA256lejXFyOX4jDtMdASdP8BLE8OHfQ.
Are you sure you want to continue connecting (yes/no)? yes
Note
When you first log into the server instead of the user in the name “ubuntu” example, if you deployed Debian / CentOS / Fedora you need to use username “debian”, “centos”, “fedora”, etc.
3. Connecting to an instance from multiple access points
Connecting to an instance from multiple hosts
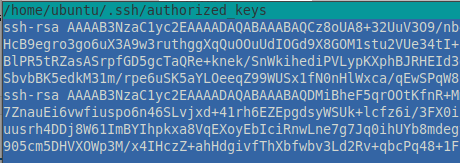
If you want to connect to the server without entering a password from several computers, it is enough to perform step “1” on each of them and add the contents of their files “~/.ssh/id_rsa.pub” to the file ~/.ssh/authorized_keys on your server (you just need to add to this file, and not replace the already entered there the key, as a result, you may have several public keys entered into the file ~/.ssh/authorized_keys each of which begins with “ssh-rsa” and ends with the name of the computer on which this key was generated).
4. Adding a key pair to an existing instance.
How to connect to an instance if you forgot to specify the ssh key
What to do if you have already created a disk based on cloudimg / openstack / GenericCloud images and deployed an instance on its base, but at the same time for any reason when creating did not connect the key pair to the instance?
Consider the option of adding a key pair in such a situation, since without adding it, you will not be able to log in to the OS.
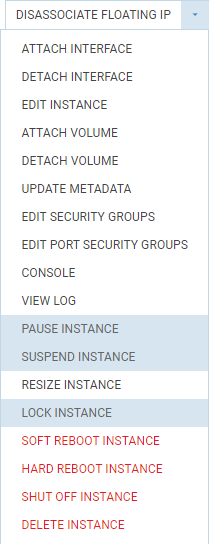
4.1 The first step is to shutdown the instance using the “SIM-Cloud” control panel. To do this, go to the “Computing resources” - “Instances” section and vice versa of the required instance, select “Turn off instance” from the drop-down list.
4.2 After the instance is turned off in the same menu, you must select the item “Delete instance” (in this case, the disk on the basis of which it was created and all data will remain intact and will not be deleted, only the configuration will be deleted instance and we will recreate it in the next step without losing data).
4.3 After we have deleted the instance, go to the “DISKS” section, opposite the desired we select the disk “Run as an instance” and fill in the parameters fields when it is important not to forget to connect the previously imported key pair according to Section 2 of this manual, or create a keychain as described in Section 1.

4.4 As a result of the operations performed, we will re-create an instance with the required parameters (CPU/RAM/Network) but with a connected key pair and without data loss.
Now you can go through OS authorization and perform further system settings. After successfully creating an instance in the terminal on the local computer, we have enough enter the command “ssh ubuntu @ server-ip-address” and confirm the connection request to the new server, authorization on the server will take place automatically, enter the password not necessary. After the first login, you can add new users to the server, change passwords for existing ones, activate authorization by login-password if you do not want to use key authorization, etc.
~$ ssh ubuntu@156.67.**.8
The authenticity of host '156.67.52.82 (156.67.**.8)' can't be established.
ECDSA key fingerprint is SHA256lejXFyOX4jDtMdASdP8BLE8OHfQ.
Are you sure you want to continue connecting (yes/no)? yes
Note
When logging into the server for the first time instead of the user in the name “ubuntu”, as in our example, if you deployed Debian / CentOS / Fedora you need use username “debian”, “centos”, “fedora”, etc.