Creating a disk from an image
Note
Free space is required in the corresponding disk storage of the user project.
- In the ‘Project’ tab, open the ‘Disks’ tab and select the ‘Disks’ category.
- Click ‘Create disk’.
In the dialog that opens, enter or choose the following values:
If you choose this parameter to create a disk, a new field will appear allowing the use of the image as a source. Select the required image from the list shown. If you create a new system boot disk, you must select an image with the required operating system. If you select ‘No sources, blank disk’, the service will create a blank disk without either a file system or a partition table. You should choose this option only if it is necessary to create an additional disk that can be connected to the instance. In our case we select to create a disk with the image for MS Windows 2016 Standard [RU] Build 14393.
Note
Note that the list of available images for disk creation includes images supported by the ‘cloud-init’ function and also with the included option ‘key-based authentication’. The use of such images will enable the deployment of instances to be accelerated thanks to advance configuration with the aid of the cloud-init scripts, and the use of authentication keys will improve the security of working with the instance. These images include the tags [cloud-init, OS] in their properties. When creating an instance on the basis of images of this type it is essential to specify a key pair for subsequent authentication; if a key is not specified, it will not be possible to complete authentication by password (in which case it will be necessary to recreate the disk using a standard image or assigning a key during a repeated creation; there also remains the alternative option of resetting the passworde using standard Linux OS methods).
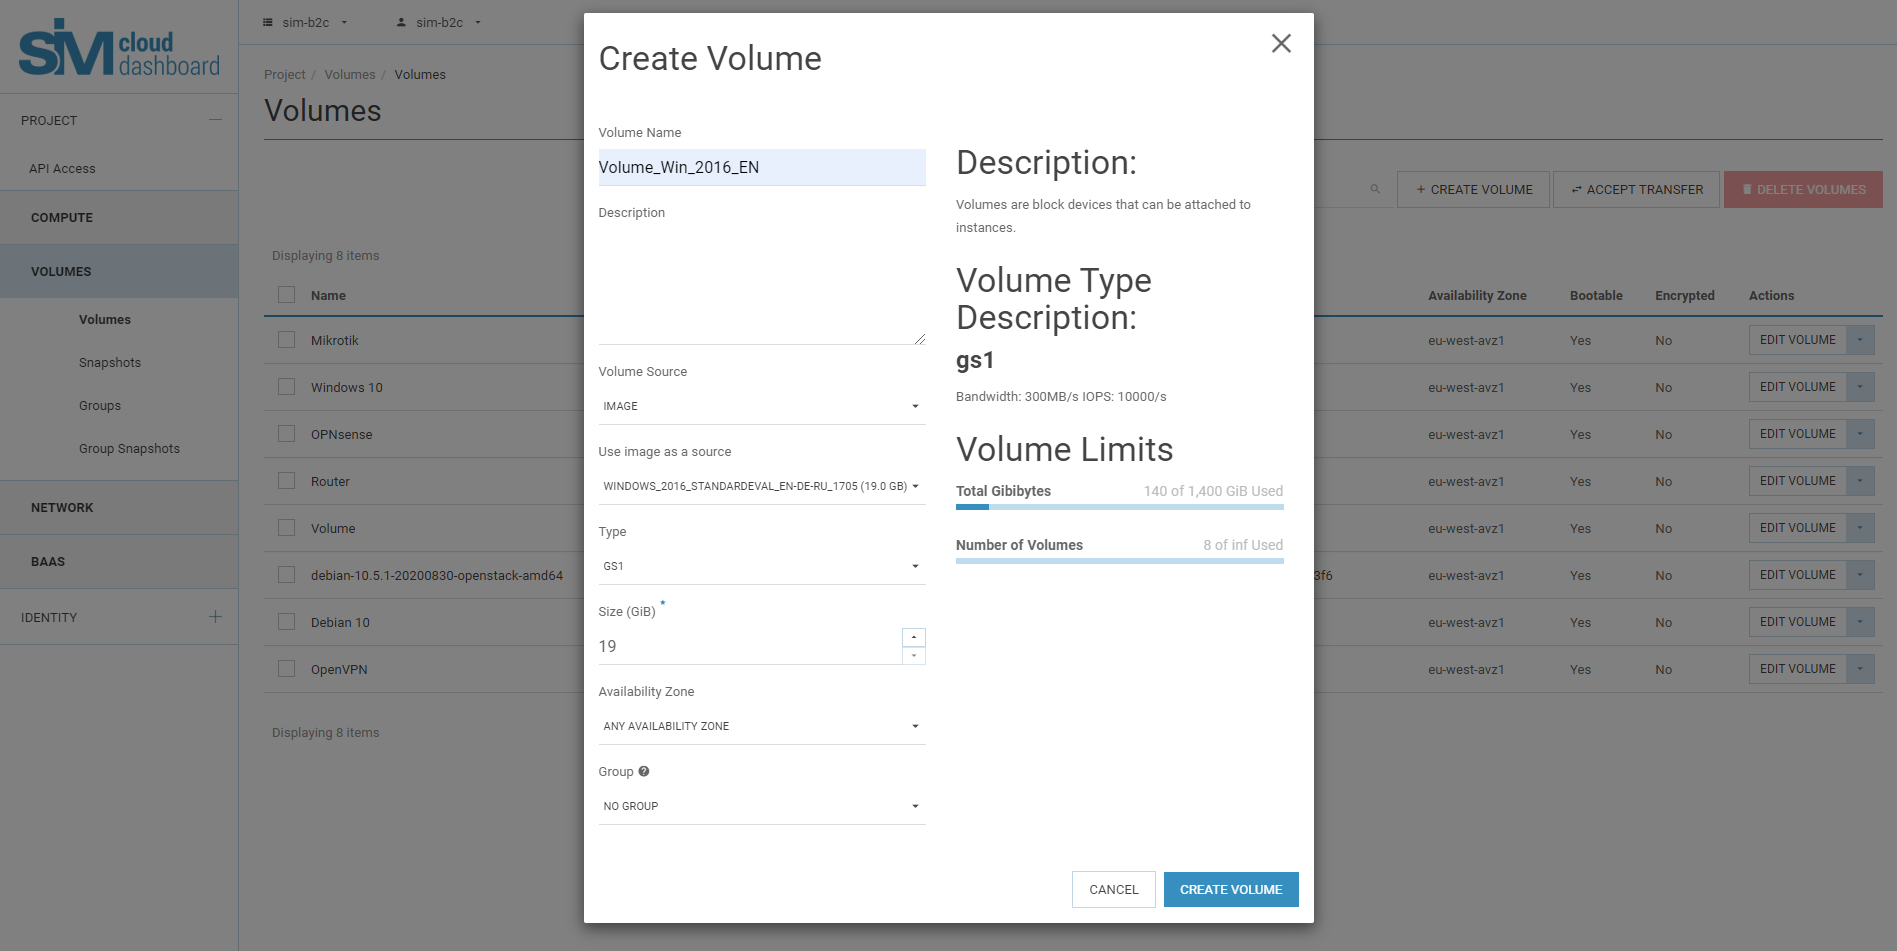
3.3. Click ‘Create disk’.
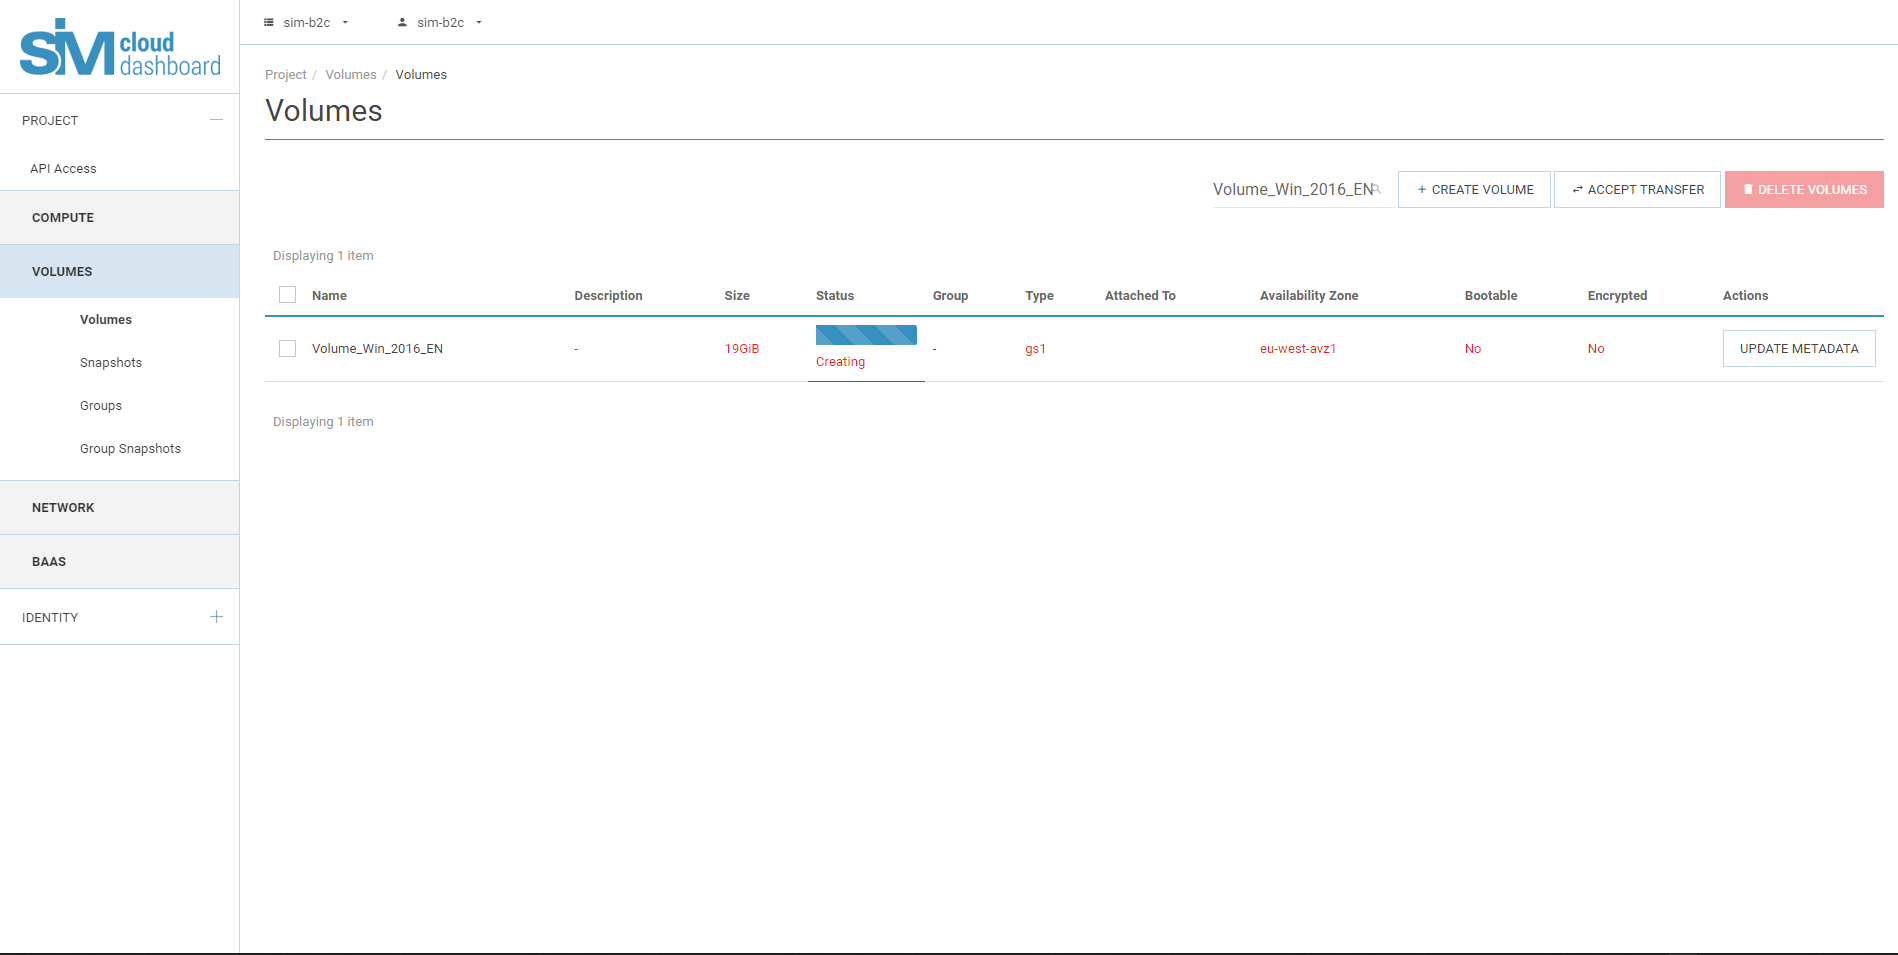
3.4. You can view the creating process on the dashboard, in the ‘Disks’ tab.
     Creating the disk can take about 10 minutes.